Getting Started with Dead Zone Revive
From first login to your first successful scavenging run.
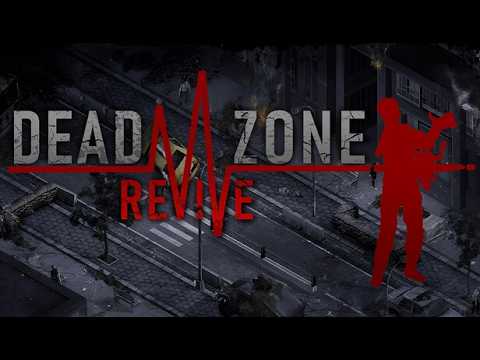
Dead Zone Revive is a free-to-play, not-for-profit fan-run revival of the classic Dead Zone isometric survival RPG, developed by Ruby Realms Studios and Switch Compagnie under agreement with Con Artist Games. You can play in a browser at the official site or through Steam Early Access. The UI is English-only today, and the project does not sell pay-to-win advantages — progression comes from missions, loot, and compound work.
This guide gets you from zero to a functional first day. For the full loop after onboarding, continue to How to Play and Controls.
Choose your platform
Two entry points exist:
- Browser — visit the official game site and log in without a Steam install. Ideal for quick sessions or low-spec PCs.
- Steam — search for Dead Zone Revive (app ID 3919900) for a desktop client with standard Steam features.
Both connect to the same survival loop: build a compound, equip survivors, run real-time scavenging missions, craft gear, and interact with alliances. Early Access launched around August 2026; some features may still be incomplete, so expect occasional rough edges rather than a finished MMO polish pass.
Create your account and first survivor
After login, the game walks you through basic survivor creation. You will pick a class among Leader, Fighter, Scavenger, Engineer, Medic, and Recon. Do not stress the choice — you can learn all six on the Class Overview page and revisit meta on the Tier List.
For a smooth first hour:
- Fighter or Scavenger forgives positioning mistakes in early missions.
- Leader helps if you plan to recruit allies quickly.
- Engineer and Medic shine once crafting and healing matter more — usually after your first compound upgrades.
Name your survivor something you will recognize in alliance chat. Dead Zone Revive is social; you will see that name on raid logs and trade requests.
Learn the UI before leaving base
Spend five minutes clicking every panel:
- Compound view — where walls, storage, and crafting stations live.
- Survivor sheet — health, skills, equipped items, and class abilities.
- Mission board — lists scavenging destinations with difficulty hints.
- Inventory — separates equipped gear, stash, and mission rewards.
Open Controls in another tab and try movement, aim, interact, and inventory keys in a safe zone. Muscle memory here saves lives on your first extraction.
First-hour checklist
Work through these goals in order:
- Complete the tutorial prompts — they introduce building placement and a short combat encounter.
- Place basic storage — you will flood with loot once missions start.
- Craft or equip starter weapons — even gray-tier gear beats fists.
- Run one easy scavenging mission — see Scavenging Missions for loadout basics.
- Return and deposit loot — never leave rare items on a corpse you cannot recover.
- Read patch highlights on the Updates hub so you know what changed this week.
If the tutorial skips a step during Early Access, check Beginner Tips for workarounds players are using.
Set up your compound skeleton
You do not need a perfect base on day one, but you need a defensible skeleton:
- A enclosed perimeter with at least one gate you can seal.
- Storage near crafting benches to reduce walking.
- A clear path from spawn to mission departure.
Full layout advice lives in Compound Setup. For now, avoid spreading buildings across open ground — raiders and hordes both punish sprawl.
Your first mission loadout
Before accepting a mission:
- Fill water and med slots if the game provides them.
- Equip your best weapon and one backup.
- Travel light until you understand encumbrance rules — see Crafting and Loot for weight tips.
Use the Loadout Planner once you have multiple viable builds. On run one, keep it simple: survive, loot containers, extract.
What to do after day one
Once you extract twice and stash rewards:
- Read How to Play for the full economy loop.
- Skim Alliances and Raiding before joining a random alliance.
- Browse the Items database to learn rarity colors and mod slots.
- Check Links and Review if you want community impressions of the revival.
Dead Zone Revive rewards patience: compound upgrades, blueprint collection, and alliance coordination all compound over weeks. Treat Early Access as a living project — report bugs through official channels and revisit guides after major updates.
Frequently Asked Questions
Quick answers for survivors in the Dead Zone.
Is Dead Zone Revive free?
Yes. It is a not-for-profit fan-licensed revival with no pay-to-win monetization. You may need a Steam account for the PC client, but the core game does not charge for power.
Which survivor class is best for new players?
Fighter and Scavenger are forgiving in early missions. Read Class Overview for role details — your best pick depends on whether you prefer combat or loot speed.
Can I play entirely in the browser?
Yes. Browser play at the official site is supported alongside Steam Early Access. Progression systems are the same; only the launcher differs.
Why does my tutorial look different from this guide?
Early Access builds change frequently. Follow in-game prompts first, then cross-check Updates and Beginner Tips if a step is missing or renamed.
Do I need to know the original Dead Zone?
No. The revival stands on its own, though veterans will recognize compound defense and scavenging DNA. This wiki uses Dead Zone Revive branding throughout.