Defense and Traps in Dead Zone Revive
Survive night pressure, zombie waves, and player raiders with layered compound defenses.
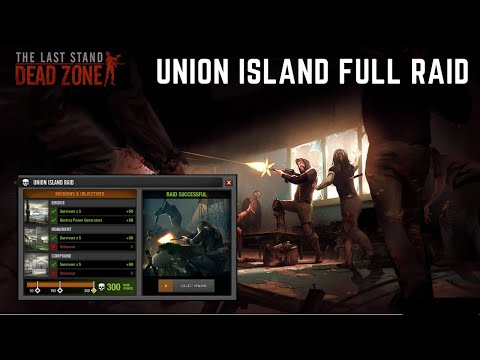
Your compound walls are not decoration — they are the line between keeping a week of Crafting and Loot progress and watching raiders walk off with rare blues. Dead Zone Revive restores classic Dead Zone pressure: night raids, PvE horde spikes, and player raiding from Alliances and Raiding. Defense is a system, not a single turret purchase. This guide explains barricades, trap lanes, Engineer bonuses, and the habits that keep your base standing when you log off.
Read Compound Setup first for perimeter basics and storage zoning. Pair trap planning with the Engineer Build page when you assign compound duty officers. Recruitment and morale matter too — starving Engineers cannot re-arm traps; see Recruitment and Morale before you stack five defenders with empty pantries.
Night raids versus player raids
Two threat profiles hit the same walls differently:
Night / PvE pressure — timed waves that punish open perimeters and unarmed trap corridors. Goals: slow approach, force pathing into kill boxes, and protect beds and craft stations so morning repairs are affordable.
Player raids — human attackers who scout weak gates, offline timers, and outer storage mistakes. Goals: inner vaults, decoy layers, alliance backup callouts, and layouts that waste breacher time.
Early Access may tune wave timing and raid permissions patch to patch — verify on Updates hub and Early Access Status before mass-investing in endgame trap tiers.
Barricades and wall discipline
Barricades are your first DPS sink. Rules that survive nostalgia and modern balance:
- No perimeter gaps — single-tile holes become raid highways.
- Upgrade gates before cosmetics — a pretty courtyard with a paper gate loses everything.
- Inner fallback ring — if outer walls fall, storage and survivors should not be one tile away.
- Sight lines — isometric angles matter; test turret coverage from common approach directions on the Map.
Barricades alone do not win sieges. They buy time for traps, turrets, and online defenders to respond.
Trap types and placement logic
Traps consume mats and maintenance attention. Place them where pathing is forced, not where you hope zombies wander:
| Trap role | Placement tip | Common mistake |
|---|---|---|
| Slow / snare | Outer approach, before choke | Scattering singles with no corridor |
| Damage spike | Inside U-shaped kill box | Blocking your own defender pathing |
| Alarm / reveal | Gate mouth and inner vault | Forgetting to re-arm after night |
| Deployable Engineer gear | Breach points alliance mates use | Covering ally exit lanes |
Kill box pattern: gate opens into a narrow corridor with traps on the sides and turret arcs at the bend. Raiders spend meds and time; defenders focus fire.
Decoy pattern: cheap outer crates along the wall; real stash sits two rings deep. Social engineering beats raw HP against experienced raiders.
Engineer synergy on defense nights
Engineers are the class that turns a wall line into a machine. In compound defense they typically:
- Reduce craft or recharge time on trap components and improvised weapons.
- Deploy field items that complement static traps during active sieges.
- Maintain barricade upgrades faster when assigned near production zones — confirm assignment UI each patch.
A compound with zero Engineers can still defend, but trap uptime and repair cadence suffer. If your alliance expects nightly raids, keep at least one Engineer online or hire one before accepting war declarations. Full stat and gear advice lives on Engineer Build; this page focuses on where Engineers matter, not every mod slot.
Pair Engineers with Medic Build defenders on long sieges — trap lanes extend fights, and medkits prevent wipe cascades when human raiders focus fire.
Defender loadouts and roster
Defense is not “everyone on the wall.” Match survivors to jobs:
- Fighters — gate choke and burst damage.
- Recon — call approach angles and counter-scout before breach.
- Leader — coordinate alliance pings and med distribution.
- Scavengers — usually off-wall during raids unless you are desperate; protect them inside the vault ring.
Stage gear in loadout lockers near the gate — use the Loadout Planner so defenders grab PvP-ready kits without crossing the whole compound mid-fight.
Maintenance rhythm (weekly minimum)
Defenses decay through use, not vanity:
- Repair walls and gates after every raid or heavy night.
- Re-arm traps — empty kill boxes are decorative.
- Refill turret ammo and check arcs after layout changes.
- Reassign class bonuses if you respec on Players hub.
- Read Updates for structure HP or trap stat changes.
Skip maintenance once and the next raider notices. Alliance reputation in Alliances and Raiding is partly “do they actually arm traps?”
Morale, hunger, and defense coupling
Traps do not eat food; survivors do. A defended compound with starving Engineers fails the next night because nobody re-armed snares. Before you declare your base raid-ready:
- Confirm food buffer from Resource Checklist.
- House defenders per Recruitment and Morale.
- Avoid recruiting a fifth Fighter if you cannot feed four.
Morale dips after repeated night losses — fix defense layers before blaming RNG on mission loot.
When to stop building and run missions
Trap perfectionism is a trap. If your next wall tier needs rare mats from high zones, run Scavenging Missions instead of rearranging outer snares for the third time.
Rule of thumb: upgrade defense one tier behind your mission threat — safe enough to recover loot, not so expensive you never leave base.
Alliance coordination
Alliances share intel on raid windows and sometimes donate defense blueprints. Before accepting incompatible layouts:
- Agree who may edit compound structures.
- Standardize breach lanes so mates do not walk into your own spikes.
- Post offline defense schedules in forum or Discord threads linked from Community Links.
Legal and project context
Dead Zone Revive is a not-for-profit fan revival licensed with Con Artist Games — no pay-to-win walls or instant mega-traps for cash. Your defense reflects time, alliance help, mission skill, and smart Engineer use. Expect trap catalogs and raid rules to evolve during Early Access; rebuild mentally each month, not always physically.
Defense and traps turn your compound from a loot warehouse into a statement. Build chokepoints, arm them nightly, and let Engineers do what they were recruited for — because in Union City, the quiet nights are the ones you prepared for.
Frequently Asked Questions
Quick answers for survivors in the Dead Zone.
What should I prioritize first: walls or traps?
Close the perimeter with walls and a gate, then add one choke corridor with traps before expensive turrets. Empty kill boxes help nobody.
Do Engineers require different traps than other classes?
Engineers use the same trap types but craft and maintain them faster when assigned near stations. Read Engineer Build for assignment and gear details.
Can traps stop player raiders alone?
Traps slow and punish raiders but rarely stop coordinated breaches. Layer walls, inner vaults, online defenders, and alliance backup.
How often should I re-arm traps after night raids?
After every heavy night or player raid if mats allow. Treat unarmed trap slots as a maintenance failure, not bad luck.
Does defense tie into recruitment and morale?
Yes. Repeated night losses and starving defenders drop morale. Feed your roster and fix chokepoints before hiring more specialists.